Most of what separates an interface that feels handcrafted from slop is small. Attention to human perception, cohesive spacing, surfaces that catch light. Almost nobody notices any one of these but I strongly believe that most people feel the sum of a bunch of tiny attentions.
Tailwind ships a strong, generic floor by design, which is fine to get up and running quickly but it's also why if you don't bother customizing it, every interface you make with it feels generic and unoriginal.
Over the last few projects I've written and adapted a set of small, composable utilities that add those details without scattering custom CSS inline. Ten of them are below, in @utility form, ready to paste into your global stylesheet and reuse in your own projects.
Eased Gradients#
First let's talk eased gradients. Let's say you're making a scrim for some overlay on an image. You reach for the obvious black-to-transparent gradient, but the end result feels oddly abrupt and unappealing. It looks like there's a sharp edge near the transparent edge where there should be none and the black part at the start is also somehow way too short.
Nothing's wrong with the gradient itself, it's just yet another quirk of human perception. When your eyes see a color change at a constant rate and then stop, your brain interprets it as a hard edge rather than the smooth transition it mathematically is. I won't get into the nitty-gritty details of why this is the case, but if you want to read up on the why, you can check out Mach Bands. While the bad news is that our eyes are terrible at their job, the good news is that you can mitigate this pretty easily with a bit of tweaking.
The classic CSS fix is to ease that progression by hand, writing out a long stack of gradient stops along an easing curve. It works, but it's a pain in the ass to write and maintain. Which is why I made a bg-eased-linear utility that mirrors Tailwind's own bg-linear-*: pick a direction (bg-eased-linear-to-t) or an angle (bg-eased-linear-60, or -bg-eased-linear-60), and it composes with the from-* and to-* utilities you already use.
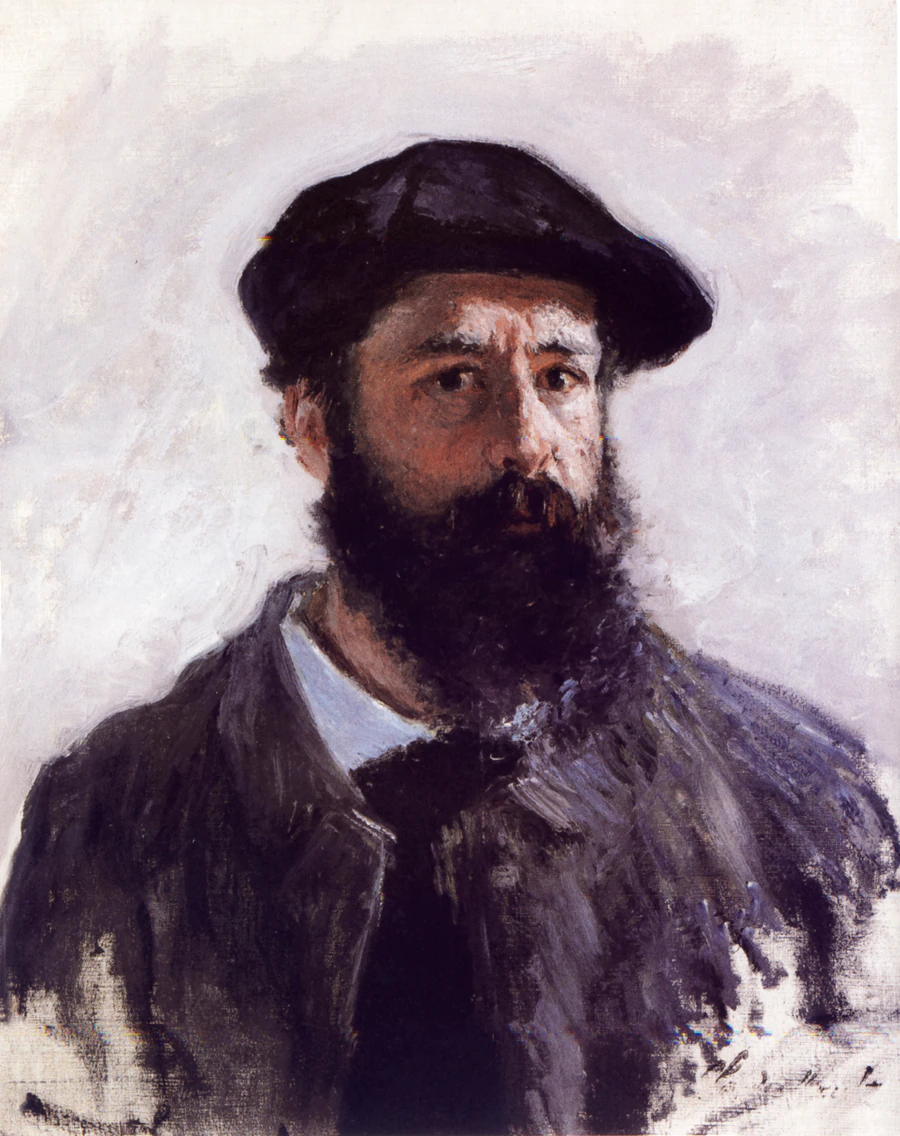
Claude Monet
Experience the revered French impressionist. Coming this July at the Pier Museum.
@theme {
  --direction-to-t: to top;
  --direction-to-tr: to top right;
  --direction-to-r: to right;
  --direction-to-br: to bottom right;
  --direction-to-b: to bottom;
  --direction-to-bl: to bottom left;
  --direction-to-l: to left;
  --direction-to-tl: to top left;
}

/* Stops are auto-spaced; each interior color is the
   from/to mix at smoothstep(t) = t * t * (3 - 2t), sampled at even t. */
@utility eased-linear-fill {
  --eg-from: var(--tw-gradient-from, currentColor);
  --eg-to: var(--tw-gradient-to, transparent);
  background-image: linear-gradient(
    var(--eg-angle, to bottom) in oklch,
    var(--eg-from),
    color-mix(in oklch, var(--eg-from), var(--eg-to) 1.1%),
    color-mix(in oklch, var(--eg-from), var(--eg-to) 4.3%),
    color-mix(in oklch, var(--eg-from), var(--eg-to) 9.2%),
    color-mix(in oklch, var(--eg-from), var(--eg-to) 15.6%),
    color-mix(in oklch, var(--eg-from), var(--eg-to) 23.2%),
    color-mix(in oklch, var(--eg-from), var(--eg-to) 31.6%),
    color-mix(in oklch, var(--eg-from), var(--eg-to) 40.7%),
    color-mix(in oklch, var(--eg-from), var(--eg-to) 50%),
    color-mix(in oklch, var(--eg-from), var(--eg-to) 59.3%),
    color-mix(in oklch, var(--eg-from), var(--eg-to) 68.4%),
    color-mix(in oklch, var(--eg-from), var(--eg-to) 76.8%),
    color-mix(in oklch, var(--eg-from), var(--eg-to) 84.4%),
    color-mix(in oklch, var(--eg-from), var(--eg-to) 90.8%),
    color-mix(in oklch, var(--eg-from), var(--eg-to) 95.7%),
    color-mix(in oklch, var(--eg-from), var(--eg-to) 98.9%),
    var(--eg-to)
  );
}

/* Direction keywords (to-t … to-tl) and angles (60, [30deg], -60). */
@utility bg-eased-linear-* {
  --eg-angle: --value(--direction-*);
  --eg-angle: calc(--value(integer) * 1deg);
  --eg-angle: --value([angle]);
  @apply eased-linear-fill;
}

@utility -bg-eased-linear-* {
  --eg-angle: calc(--value(integer) * -1deg);
  --eg-angle: calc(--value([angle]) * -1);
  @apply eased-linear-fill;
}
Progressive Blur#
Following up on the eased gradients, have you ever noticed the edge blurs in iOS? The content blurs more and more as it moves towards the viewport edge.
We can reproduce this effect in CSS by layering a couple of blur layers one on top of the other. Now this is normally a lot of work to set up, but with a relatively simple Tailwind CSS utility it's a breeze. Here it is in action:
Scroll down to see the progressive blur effect in action.
Ah! what splendid sunsets they beheld during those weekly strolls. The sun accompanied them, as it were, amid the throbbing gaiety of the quays, the river life, the dancing ripples of the currents; amid the attractions of the shops, as warm as conservatories, the flowers sold by the seed merchants, and the noisy cages of the bird fanciers; amid all the din of sound and wealth of colour which ever make a city’s waterside its youthful part. As they proceeded, the ardent blaze of the western sky turned to purple on their left, above the dark line of houses, and the orb of day seemed to wait for them, falling gradually lower, slowly rolling towards the distant roofs when once they had passed the Pont Notre-Dame in front of the widening stream. In no ancient forest, on no mountain road, beyond no grassy plain will there ever be such triumphal sunsets as behind the cupola of the Institute. It is there one sees Paris retiring to rest in all her glory. At each of their walks the aspect of the conflagration changed; fresh furnaces added their glow to the crown of flames. One evening, when a shower had surprised them, the sun, showing behind the downpour, lit up the whole rain cloud, and upon their heads there fell a spray of glowing water, irisated with pink and azure. On the days when the sky was clear, however, the sun, like a fiery ball, descended majestically in an unruffled sapphire lake; for a moment the black cupola of the Institute seemed to cut away part of it and make it look like the waning moon; then the globe assumed a violet tinge and at last became submerged in the lake, which had turned blood-red. Already, in February, the planet described a wider curve, and fell straight into the Seine, which seemed to seethe on the horizon as at the contact of red-hot iron. However, the grander scenes, the vast fairy pictures of space only blazed on cloudy evenings. Then, according to the whim of the wind, there were seas of sulphur splashing against coral reefs; there were palaces and towers, marvels of architecture, piled upon one another, burning and crumbling, and throwing torrents of lava from their many gaps; or else the orb which had disappeared, hidden by a veil of clouds, suddenly transpierced that veil with such a press of light that shafts of sparks shot forth from one horizon to the other, showing as plainly as a volley of golden arrows. And then the twilight fell, and they said good-bye to each other, while their eyes were still full of the final dazzlement. They felt that triumphal Paris was the accomplice of the joy which they could not exhaust, the joy of ever resuming together that walk beside the old stone parapets.
While this effect is pretty simple to set up when you have the utility classes, it has three core quirks to keep in mind:
- The blur layers are actual HTML layers, not just CSS filters. So you can't just apply a
progressive-blur-*to a parent element and expect it to work. You need to apply a key to each blur layer to ensure they stack correctly. - Since the GPU is computing blur on blurs many times over, this effect can be quite expensive. By default, the effect will render 6 blur layers, which gets expensive on a large screen. You can reduce the number of blur layers by adjusting
[--progressive-blur-layers:n]on the container and the corresponding[--blur-layer:n]but I would still suggest keeping the number of progressive blurs you're rendering on a page to a minimum. backdrop-filter: blur()has this nasty tendency to create flickering edges because of the way the browser computes blur so if the effect sits on a uniform background, I strongly suggest adding a scrim to gradually fade out the content on top of blurring it. You can use theprogressive-blur-scrim-*utility classes to quickly add a scrim to your blur effect.
Here's the basic structure you need to set up a progressive blur effect in JSX:
<div className="progressive-blur-md progressive-blur-scrim-background">
  {[...Array(6)].map((_, i) => (
    <div key={i} className={`[--blur-layer:${i + 1}]`} />
  ))}
</div>
And here's the utility definition:
@utility blur-ramp {
  --progressive-blur-layers: 6;
  position: relative;
  isolation: isolate;
  transform: translateZ(0) var(--tw-rotate-x) var(--tw-rotate-y) var(--tw-rotate-z) var(--tw-skew-x) var(--tw-skew-y);

  &::after {
    content: '';
    position: absolute;
    inset: 0;
    z-index: calc(var(--progressive-blur-layers) + 1);
    pointer-events: none;
    border-radius: inherit;
    background: linear-gradient(
      to top,
      transparent,
      var(--progressive-blur-scrim, transparent)
    );
  }

  & > * {
    position: absolute;
    inset: 0;
    z-index: var(--blur-layer);
    pointer-events: none;
    backdrop-filter: blur(
      calc(var(--progressive-blur-amount, var(--blur-lg)) * pow(2, (var(--blur-layer) - var(--progressive-blur-layers))))
    );
    mask-image: linear-gradient(
      to top,
      transparent calc(100% / var(--progressive-blur-layers) * (var(--blur-layer) - 2)),
      black calc(100% / var(--progressive-blur-layers) * (var(--blur-layer) - 1)),
      black calc(100% / var(--progressive-blur-layers) * var(--blur-layer)),
      transparent calc(100% / var(--progressive-blur-layers) * (var(--blur-layer) + 1))
    );
  }
}

@utility progressive-blur {
  @apply blur-ramp;
}

@utility progressive-blur-* {
  --progressive-blur-amount: --value(--blur-*);
  @apply blur-ramp;
}

@utility progressive-blur-scrim-* {
  --progressive-blur-scrim: --value(--color-*);
}
Grain Filter#
Sometimes all your design is missing is just a little bit of texture. You really don't need fancy shaders or heavy image assets to remove the unnatural look of perfect gradients. A little random noise can do the trick without needing anything other than plain CSS.
The grain-* Tailwind utility I've created applies a simple feTurbulence filter to create a grainy texture effect. I've also exposed a couple of knobs for you to tweak the filter's behavior. You can firstly adjust the tile/grain size using grain-xs through grain-lg (or an arbitrary grain-[120px]). You can tweak the opacity to your liking using the grain-opacity-*. You can also change the blend mode using the grain-blend-* utility (Though I've found it's best to stick with the default overlay blend mode). Finally, if you really want to turn it up a notch, I've even exposed a grain-animate that makes the noise flicker since it's cheap and static, so it costs nothing at runtime.
@theme {
  --grain-size-xs: 64px;
  --grain-size-sm: 128px;
  --grain-size-md: 256px;
  --grain-size-lg: 512px;

  --grain-blend-normal: normal;
  --grain-blend-overlay: overlay;
  --grain-blend-soft-light: soft-light;
}

@keyframes grain-flicker {
  0% { background-position: 0 0; }
  25% { background-position: -27px 7px; }
  50% { background-position: 21px 29px; }
  75% { background-position: 29px 9px; }
}

@utility film-grain {
  position: relative;
  isolation: isolate;
  &::after {
    content: '';
    position: absolute;
    inset: 0;
    z-index: 1;
    border-radius: inherit; /* clip the tile to the parent's rounded corners */
    pointer-events: none;
    opacity: var(--grain-opacity, 0.035);
    mix-blend-mode: var(--grain-blend, overlay);
    animation: var(--grain-animation, none);
    background-image: url("data:image/svg+xml,%3Csvg xmlns='http://www.w3.org/2000/svg' width='256' height='256'%3E%3Cfilter id='g' color-interpolation-filters='sRGB'%3E%3CfeTurbulence type='fractalNoise' baseFrequency='0.8' numOctaves='2' stitchTiles='stitch'/%3E%3CfeColorMatrix type='matrix' values='0.33 0.33 0.33 0 0 0.33 0.33 0.33 0 0 0.33 0.33 0.33 0 0 0 0 0 0 1'/%3E%3C/filter%3E%3Crect width='100%25' height='100%25' filter='url(%23g)'/%3E%3C/svg%3E");
    background-size: var(--grain-size, var(--grain-size-md)) var(--grain-size, var(--grain-size-md));
  }
}

@utility grain {
  @apply film-grain;
}

@utility grain-* {
  --grain-size: --value(--grain-size-*, [length]);
  --grain-blend: --value(--grain-blend-*);
  @apply film-grain;
}

@utility grain-opacity-* {
  --grain-opacity: calc(--value(number) * 1%);
  --grain-opacity: --value([percentage]);
}

@utility grain-animate {
  @media (prefers-reduced-motion: no-preference) {
    --grain-animation: grain-flicker 0.3s steps(1) infinite;
  }
}
Glossy Buttons#
Hot take, I sort of miss Vista. The peak Frutiger Aero experience. Everything felt like it was made out of glass (or cheap acrylic) and it had a very distinctive style. Now with Liquid Glass, I feel like transparent skeuomorphic surfaces are making a comeback.
Faking refractions has always been hard especially in CSS because it requires faking a lot of the light interaction but a surefire way of adding surface dimensionality is to add surface reflections. Here's a simple util that adds a surface reflection on a before element so it pairs beautifully with gradient surfaces.
It reuses conventions you already know. Tint and strength are a color and an opacity, glossy-sky-300/30 for a cool reflection, bare glossy for white at 35%. How far the highlight reaches down the face is a number, glossy-40 covers 40% of the height, and the negative anchors it to the bottom edge instead, -glossy-40, for light bouncing up off whatever sits below. I left out arbitrary angles on purpose: a highlight raking in from the side reads as wrong before you can say why.
@utility glossy {
  position: relative;
  isolation: isolate;
  &::before {
    content: '';
    position: absolute;
    inset: 0;
    z-index: -1;
    border-radius: inherit;
    background: radial-gradient(
      120% var(--glossy-h, 55%) at 50% var(--glossy-y, 0%),
      var(--glossy-color, rgb(255 255 255 / 0.35)),
      transparent 55%
    );
    pointer-events: none;
  }
}

/* glossy-<n> = reach; glossy-<color>/<opacity> = tint + strength */
@utility glossy-* {
  --glossy-color: --value(--color-*);
  --glossy-color: color-mix(in oklch, --value(--color-*) calc(--modifier(number) * 1%), transparent);
  --glossy-h: calc(--value(number) * 1%);
  --glossy-h: --value([percentage], [length]);
}

/* -glossy-<n> = same reach, anchored at the bottom */
@utility -glossy-* {
  --glossy-h: calc(--value(number) * 1%);
  --glossy-h: --value([percentage], [length]);
  --glossy-y: 100%;
}
Fade Clipping Mask#
One of the nicest little touches you can give a scroll area or a marquee is letting the content fade softly as it runs off the edge, rather than stopping dead at a hard overflow: hidden line. You've seen it everywhere, and the mechanism is no secret: a mask-image gradient from opaque to transparent, fading the pixels out right at the boundary. The one fiddly part is rewriting that gradient by hand for every edge and every axis, on every project.
So I packaged it into a small utility aimed squarely at where you actually want it: scroll areas, marquees, overflowing rows, anywhere content should slip past an edge cleanly. fade-y fades the top and bottom, fade-x the left and right, and fade-t, fade-b, fade-l, fade-r each take a single side. The reach defaults to a comfortable 1.5rem so fade-y on its own already looks right, with fade-8 or fade-[3rem] there when you want to nudge it. One class, pointed at whichever edges you like.
A couple of things make it nicer to live with. Because it's a mask and not a scrim, it doesn't care what sits behind it, there's no background color to match, so the same class holds up over a gradient, a photo, or a busy patterned background just as well as over flat white. And the gradient it masks with is the eased one from the top of the article rather than a straight linear ramp, so the falloff reads as genuinely soft instead of bringing back the Mach-band edge we started with.
One last touch: feed it the offsets from a scroll container through the --scroll-area-overflow-* variables and each edge only fades while there's actually something clipped behind it, easing back to nothing as you reach the end of the scroll. Leave them out and it's a plain, always-on fade, which is all you need most of the time.
/* --fade-s/--fade-e hold the start/end reach so the smoothstep stops below
   read cleanly; the alpha values are the same curve as the eased gradient. */
@utility fade-y {
  --fade-s: min(var(--fade, 1.5rem), var(--scroll-area-overflow-y-start, var(--fade, 1.5rem)));
  --fade-e: min(var(--fade, 1.5rem), var(--scroll-area-overflow-y-end, var(--fade, 1.5rem)));
  mask-image: linear-gradient(
    to bottom,
    rgb(0 0 0 / 0),
    rgb(0 0 0 / 0.043) calc(var(--fade-s) * 0.125),
    rgb(0 0 0 / 0.156) calc(var(--fade-s) * 0.25),
    rgb(0 0 0 / 0.316) calc(var(--fade-s) * 0.375),
    rgb(0 0 0 / 0.5) calc(var(--fade-s) * 0.5),
    rgb(0 0 0 / 0.684) calc(var(--fade-s) * 0.625),
    rgb(0 0 0 / 0.844) calc(var(--fade-s) * 0.75),
    rgb(0 0 0 / 0.957) calc(var(--fade-s) * 0.875),
    #000 var(--fade-s),
    #000 calc(100% - var(--fade-e)),
    rgb(0 0 0 / 0.957) calc(100% - var(--fade-e) * 0.875),
    rgb(0 0 0 / 0.844) calc(100% - var(--fade-e) * 0.75),
    rgb(0 0 0 / 0.684) calc(100% - var(--fade-e) * 0.625),
    rgb(0 0 0 / 0.5) calc(100% - var(--fade-e) * 0.5),
    rgb(0 0 0 / 0.316) calc(100% - var(--fade-e) * 0.375),
    rgb(0 0 0 / 0.156) calc(100% - var(--fade-e) * 0.25),
    rgb(0 0 0 / 0.043) calc(100% - var(--fade-e) * 0.125),
    rgb(0 0 0 / 0)
  );
  mask-repeat: no-repeat;
}

/* fade-t/b drop one side; fade-x/l/r switch to the overflow-x variables */
@utility fade-* {
  --fade: calc(--value(number) * var(--spacing));
  --fade: --value([length]);
}
Surface Patterns#
The grain from earlier breaks up a flat fill with a bit of organic noise. Sometimes a panel wants the opposite: a little structure. A faint dot field or a grid is enough to turn an empty box into something that reads as a place you could set things down, the quiet graph-paper feel of a canvas or a design tool, there without really being noticed.
Underneath it's the usual CSS: a repeating radial-gradient stamps out the dots, a pair of linear-gradients crosses into a grid, and background-size decides how often they tile. pattern-dots and pattern-grid wrap up the two, and one knob sets the cell size, pattern-8 on the spacing scale or pattern-[20px] for an exact tile. That's the whole API, and the dotted half is the same trick that already sits behind this site's artifact pages, just generalized so it drops onto anything.
The one nicety worth pointing out is that none of the color is baked in. The pattern draws in currentColor, so it follows whatever text-* you put on the element, text-zinc-200 for a barely-there gray, something darker when you want the structure to actually read. Keep it faint and it does what a background pattern should: give a surface a little rhythm without ever pulling focus.
Specimen №6
@utility pattern-dots {
  background-image: radial-gradient(currentColor 1px, transparent 1px);
  background-size: var(--pattern, 16px) var(--pattern, 16px);
}

@utility pattern-grid {
  background-image:
    linear-gradient(to right, currentColor 1px, transparent 1px),
    linear-gradient(to bottom, currentColor 1px, transparent 1px);
  background-size: var(--pattern, 16px) var(--pattern, 16px);
}

@utility pattern-* {
  --pattern: calc(--value(number) * var(--spacing));
  --pattern: --value([length]);
}
Squircle Corners#
Caring about the exact shape of a rounded corner is a slightly unhinged way to spend your attention, and yet here we are. Apple has been rounding its corners with a superellipse rather than a plain circle for years, and the moment someone points it out you can't stop seeing it. A normal CSS border-radius rushes through its curve and snaps back to the straight edge. A superellipse eases out of the turn so gradually there's no single point you could put your finger on and call the corner. Set the two side by side and the circular one suddenly looks pinched, like it's in a hurry to be a rectangle again.
The shape is called a squircle, and CSS can finally draw one natively with the corner-shape property, no SVG or clip-path gymnastics required. The squircle utility turns it on over whatever radius you already have: keep your rounded-* as is, add squircle, and the corner upgrades itself from a circle to a superellipse. A single number says how far to take it, squircle-1 being the plain round corner you started with and squircle-2 the full Apple curve, with the values between for when the whole thing is a touch much. Fair warning though: ship it once and you'll start spotting every un-squircled corner on the rest of the web, a small tax on having yours look right.
@utility squircle {
  corner-shape: superellipse(var(--squircle, 2));
}

/* strength = superellipse exponent: squircle-1 round … squircle-2 full */
@utility squircle-* {
  --squircle: --value(number, [number]);
  corner-shape: superellipse(var(--squircle));
}Shimmering Skeleton#
A loading skeleton is mostly a kind of polite theater. The gray boxes don't bring the data in any sooner, and the light sweeping across them isn't measuring anything real, but the movement quietly promises that something's still happening and the page hasn't died on you. It's a small reassurance, and somehow it makes the same two-second wait feel shorter than a spinner ever manages.
If you're going to put on a show, though, the light may as well be nice to look at. The effect underneath is old and everywhere, just a pale gradient sliding across the element on a loop, but most takes leave the band's edges linear, so the bright streak comes and goes a little more abruptly than it should. The shimmer utility runs it through the same eased ramp the gradients use instead, so the highlight swells up and fades back without a hard edge anywhere on it. It sweeps white at 50% on its own, and shimmer-zinc-300/40, or any color and opacity you like, steps in when white reads too harsh over your grays.
Pace it with the Tailwind duration scale you already know: shimmer-duration-2000 gives a slow, drawn-out pass, and you can take it quicker when you want the wait to feel more alive. And since the whole thing is motion for its own sake, it bows out completely under prefers-reduced-motion, sitting perfectly still for anyone who'd rather the screen stayed quiet.
@keyframes shimmer {
  from { background-position: -150% 0; }
  to { background-position: 250% 0; }
}

@utility shimmer {
  --shimmer-c: var(--shimmer, rgb(255 255 255 / 0.5));
  background-image: linear-gradient(
    90deg,
    transparent,
    color-mix(in oklch, var(--shimmer-c) 4.3%, transparent) 6.25%,
    color-mix(in oklch, var(--shimmer-c) 15.6%, transparent) 12.5%,
    color-mix(in oklch, var(--shimmer-c) 31.6%, transparent) 18.75%,
    color-mix(in oklch, var(--shimmer-c) 50%, transparent) 25%,
    color-mix(in oklch, var(--shimmer-c) 68.4%, transparent) 31.25%,
    color-mix(in oklch, var(--shimmer-c) 84.4%, transparent) 37.5%,
    color-mix(in oklch, var(--shimmer-c) 95.7%, transparent) 43.75%,
    var(--shimmer-c) 50%,
    color-mix(in oklch, var(--shimmer-c) 95.7%, transparent) 56.25%,
    color-mix(in oklch, var(--shimmer-c) 84.4%, transparent) 62.5%,
    color-mix(in oklch, var(--shimmer-c) 68.4%, transparent) 68.75%,
    color-mix(in oklch, var(--shimmer-c) 50%, transparent) 75%,
    color-mix(in oklch, var(--shimmer-c) 31.6%, transparent) 81.25%,
    color-mix(in oklch, var(--shimmer-c) 15.6%, transparent) 87.5%,
    color-mix(in oklch, var(--shimmer-c) 4.3%, transparent) 93.75%,
    transparent
  );
  background-size: 200% 100%;
  background-repeat: no-repeat;
  @media (prefers-reduced-motion: no-preference) {
    animation: shimmer var(--shimmer-duration, 1.5s) linear infinite;
  }
}

@utility shimmer-* {
  --shimmer: --value(--color-*);
  --shimmer: color-mix(in oklch, --value(--color-*) calc(--modifier(number) * 1%), transparent);
}

/* sweep time in ms, like Tailwind's duration-* */
@utility shimmer-duration-* {
  --shimmer-duration: calc(--value(number) * 1ms);
  --shimmer-duration: --value([*]);
}
Animated Border Highlight#
Somewhere in the last couple of years, a slowly rotating gradient border became the universal badge for "this is the special one." The premium plan, the AI feature, the one card on the page they really want your eye to land on, all of them ringed with a bright spot quietly doing laps around the edge. A moving highlight is almost impossible to look away from, which is exactly the reason to spend it on one element and not five.
The ring itself is the familiar gradient-border trick: paint a conic-gradient onto a pseudo-element, then mask away everything but a thin band around the edge. The only catch is the spin: a bare custom property judders when you try to animate its angle, so registering it as an @property is what lets the browser glide it round smoothly.
On its own, shimmer-border puts a currentColor highlight on an otherwise invisible 1.5px ring and sends it round once every three seconds. Everything you'd want to change has its own knob: a number for the width (shimmer-border-2), a color for the bright peak (shimmer-border-sky-400, or just set the element's text color the way the demo does), shimmer-border-lo-* for the resting color it fades back to between passes, and shimmer-border-duration-2000 for the lap time, on the same scale as every other duration in the set.
And like the plain shimmer, it only moves when motion is welcome. Under prefers-reduced-motion the light parks and you're left with a plain static gradient border, which is plenty on its own.
SuperNova Premium
$13.99/mo
@property --shimmer-border-angle {
  syntax: '<angle>';
  inherits: false;
  initial-value: 0deg;
}

@keyframes shimmer-border-spin {
  to { --shimmer-border-angle: 360deg; }
}

@utility shimmer-border {
  position: relative;
  isolation: isolate;
  &::after {
    content: '';
    position: absolute;
    inset: 0;
    z-index: -1;
    border-radius: inherit;
    padding: var(--shimmer-border-width, 1.5px);
    background: conic-gradient(
      from var(--shimmer-border-angle),
      var(--shimmer-border-lo, transparent),
      var(--shimmer-border-hi, currentColor),
      var(--shimmer-border-lo, transparent) 25%
    );
    /* paint the whole box, subtract the content box: only the ring survives */
    mask: linear-gradient(#000 0 0) content-box, linear-gradient(#000 0 0);
    mask-composite: exclude;
    pointer-events: none;
    @media (prefers-reduced-motion: no-preference) {
      animation: shimmer-border-spin var(--shimmer-border-duration, 3s) linear infinite;
    }
  }
}

/* shimmer-border-<n> = ring width; bare color = the beam peak (hi) */
@utility shimmer-border-* {
  --shimmer-border-width: calc(--value(number) * 1px);
  --shimmer-border-width: --value([length]);
  --shimmer-border-hi: --value(--color-*);
  --shimmer-border-hi: color-mix(in oklch, --value(--color-*) calc(--modifier(number) * 1%), transparent);
}

@utility shimmer-border-hi-* {
  --shimmer-border-hi: --value(--color-*);
  --shimmer-border-hi: color-mix(in oklch, --value(--color-*) calc(--modifier(number) * 1%), transparent);
}

@utility shimmer-border-lo-* {
  --shimmer-border-lo: --value(--color-*);
  --shimmer-border-lo: color-mix(in oklch, --value(--color-*) calc(--modifier(number) * 1%), transparent);
}

/* lap time in ms, like Tailwind's duration-* */
@utility shimmer-border-duration-* {
  --shimmer-border-duration: calc(--value(number) * 1ms);
  --shimmer-border-duration: --value([*]);
}
Animated SVG Paths#
A checkmark that draws itself in, instead of just popping into place, is a satisfying little flourish on a success state. The effect itself is an old SVG trick: make the stroke one long dash as long as the whole path, offset it out of view, then animate that offset back to zero so the line looks like it's being drawn.
The annoying part has always been that "as long as the whole path" bit, which normally means measuring the path in JavaScript first. draw-path skips that: add pathLength="1" to your <svg> paths so the browser treats each one as a single unit long, then drop draw-path on the parent and each path inside draws itself. Timing is two knobs, draw-path-duration-700 for the pace and draw-path-ease-out for the easing. And since it's purely decorative, it only runs when motion is welcome. Under prefers-reduced-motion the icon just shows up fully drawn.
And if you want a little extra sass, run a subtle entry on the container at the same time: a slight scale-up, a little blur clearing, a fade in. The line drawing itself while the whole icon settles into place lands far better than either move on its own.
@keyframes draw-path {
  to { stroke-dashoffset: 0; }
}

@utility draw-path {
  & path {
    @media (prefers-reduced-motion: no-preference) {
      stroke-dasharray: var(--draw-length, 1);
      stroke-dashoffset: var(--draw-length, 1);
      animation: draw-path var(--draw-duration, 1s) var(--draw-ease, ease) forwards;
    }
  }
}

/* draw time in ms, like Tailwind's duration-* */
@utility draw-path-duration-* {
  --draw-duration: calc(--value(number) * 1ms);
  --draw-duration: --value([*]);
}

/* easing from the --ease-* scale, like Tailwind's ease-* */
@utility draw-path-ease-* {
  --draw-ease: --value(--ease-*);
  --draw-ease: --value([*]);
}
The Whole Set#
Want the whole set of utilities? Copy and paste the following block into your own stylesheet.
@theme {
  --direction-to-t: to top;
  --direction-to-tr: to top right;
  --direction-to-r: to right;
  --direction-to-br: to bottom right;
  --direction-to-b: to bottom;
  --direction-to-bl: to bottom left;
  --direction-to-l: to left;
  --direction-to-tl: to top left;

  --grain-size-xs: 64px;
  --grain-size-sm: 128px;
  --grain-size-md: 256px;
  --grain-size-lg: 512px;

  --grain-blend-normal: normal;
  --grain-blend-overlay: overlay;
  --grain-blend-soft-light: soft-light;
}

@keyframes grain-flicker {
  0% { background-position: 0 0; }
  25% { background-position: -27px 7px; }
  50% { background-position: 21px 29px; }
  75% { background-position: 29px 9px; }
}

@utility eased-linear-fill {
  --eg-from: var(--tw-gradient-from, currentColor);
  --eg-to: var(--tw-gradient-to, transparent);
  background-image: linear-gradient(
    var(--eg-angle, to bottom) in oklch,
    var(--eg-from),
    color-mix(in oklch, var(--eg-from), var(--eg-to) 1.1%),
    color-mix(in oklch, var(--eg-from), var(--eg-to) 4.3%),
    color-mix(in oklch, var(--eg-from), var(--eg-to) 9.2%),
    color-mix(in oklch, var(--eg-from), var(--eg-to) 15.6%),
    color-mix(in oklch, var(--eg-from), var(--eg-to) 23.2%),
    color-mix(in oklch, var(--eg-from), var(--eg-to) 31.6%),
    color-mix(in oklch, var(--eg-from), var(--eg-to) 40.7%),
    color-mix(in oklch, var(--eg-from), var(--eg-to) 50%),
    color-mix(in oklch, var(--eg-from), var(--eg-to) 59.3%),
    color-mix(in oklch, var(--eg-from), var(--eg-to) 68.4%),
    color-mix(in oklch, var(--eg-from), var(--eg-to) 76.8%),
    color-mix(in oklch, var(--eg-from), var(--eg-to) 84.4%),
    color-mix(in oklch, var(--eg-from), var(--eg-to) 90.8%),
    color-mix(in oklch, var(--eg-from), var(--eg-to) 95.7%),
    color-mix(in oklch, var(--eg-from), var(--eg-to) 98.9%),
    var(--eg-to)
  );
}

@utility bg-eased-linear-* {
  --eg-angle: --value(--direction-*);
  --eg-angle: calc(--value(integer) * 1deg);
  --eg-angle: --value([angle]);
  @apply eased-linear-fill;
}

@utility -bg-eased-linear-* {
  --eg-angle: calc(--value(integer) * -1deg);
  --eg-angle: calc(--value([angle]) * -1);
  @apply eased-linear-fill;
}

@utility glossy {
  position: relative;
  isolation: isolate;
  &::before {
    content: '';
    position: absolute;
    inset: 0;
    z-index: -1;
    border-radius: inherit;
    background: radial-gradient(
      120% var(--glossy-h, 55%) at 50% var(--glossy-y, 0%),
      var(--glossy-color, rgb(255 255 255 / 0.35)),
      transparent 55%
    );
    pointer-events: none;
  }
}

@utility glossy-* {
  --glossy-color: --value(--color-*);
  --glossy-color: color-mix(in oklch, --value(--color-*) calc(--modifier(number) * 1%), transparent);
  --glossy-h: calc(--value(number) * 1%);
  --glossy-h: --value([percentage], [length]);
}

@utility -glossy-* {
  --glossy-h: calc(--value(number) * 1%);
  --glossy-h: --value([percentage], [length]);
  --glossy-y: 100%;
}

@utility fade-y {
  --fade-s: min(var(--fade, 1.5rem), var(--scroll-area-overflow-y-start, var(--fade, 1.5rem)));
  --fade-e: min(var(--fade, 1.5rem), var(--scroll-area-overflow-y-end, var(--fade, 1.5rem)));
  mask-image: linear-gradient(
    to bottom,
    rgb(0 0 0 / 0),
    rgb(0 0 0 / 0.043) calc(var(--fade-s) * 0.125),
    rgb(0 0 0 / 0.156) calc(var(--fade-s) * 0.25),
    rgb(0 0 0 / 0.316) calc(var(--fade-s) * 0.375),
    rgb(0 0 0 / 0.5) calc(var(--fade-s) * 0.5),
    rgb(0 0 0 / 0.684) calc(var(--fade-s) * 0.625),
    rgb(0 0 0 / 0.844) calc(var(--fade-s) * 0.75),
    rgb(0 0 0 / 0.957) calc(var(--fade-s) * 0.875),
    #000 var(--fade-s),
    #000 calc(100% - var(--fade-e)),
    rgb(0 0 0 / 0.957) calc(100% - var(--fade-e) * 0.875),
    rgb(0 0 0 / 0.844) calc(100% - var(--fade-e) * 0.75),
    rgb(0 0 0 / 0.684) calc(100% - var(--fade-e) * 0.625),
    rgb(0 0 0 / 0.5) calc(100% - var(--fade-e) * 0.5),
    rgb(0 0 0 / 0.316) calc(100% - var(--fade-e) * 0.375),
    rgb(0 0 0 / 0.156) calc(100% - var(--fade-e) * 0.25),
    rgb(0 0 0 / 0.043) calc(100% - var(--fade-e) * 0.125),
    rgb(0 0 0 / 0)
  );
  mask-repeat: no-repeat;
}

@utility fade-t {
  --fade-s: min(var(--fade, 1.5rem), var(--scroll-area-overflow-y-start, var(--fade, 1.5rem)));
  mask-image: linear-gradient(
    to bottom,
    rgb(0 0 0 / 0),
    rgb(0 0 0 / 0.043) calc(var(--fade-s) * 0.125),
    rgb(0 0 0 / 0.156) calc(var(--fade-s) * 0.25),
    rgb(0 0 0 / 0.316) calc(var(--fade-s) * 0.375),
    rgb(0 0 0 / 0.5) calc(var(--fade-s) * 0.5),
    rgb(0 0 0 / 0.684) calc(var(--fade-s) * 0.625),
    rgb(0 0 0 / 0.844) calc(var(--fade-s) * 0.75),
    rgb(0 0 0 / 0.957) calc(var(--fade-s) * 0.875),
    #000 var(--fade-s)
  );
  mask-repeat: no-repeat;
}

@utility fade-b {
  --fade-e: min(var(--fade, 1.5rem), var(--scroll-area-overflow-y-end, var(--fade, 1.5rem)));
  mask-image: linear-gradient(
    to top,
    rgb(0 0 0 / 0),
    rgb(0 0 0 / 0.043) calc(var(--fade-e) * 0.125),
    rgb(0 0 0 / 0.156) calc(var(--fade-e) * 0.25),
    rgb(0 0 0 / 0.316) calc(var(--fade-e) * 0.375),
    rgb(0 0 0 / 0.5) calc(var(--fade-e) * 0.5),
    rgb(0 0 0 / 0.684) calc(var(--fade-e) * 0.625),
    rgb(0 0 0 / 0.844) calc(var(--fade-e) * 0.75),
    rgb(0 0 0 / 0.957) calc(var(--fade-e) * 0.875),
    #000 var(--fade-e)
  );
  mask-repeat: no-repeat;
}

@utility fade-x {
  --fade-s: min(var(--fade, 1.5rem), var(--scroll-area-overflow-x-start, var(--fade, 1.5rem)));
  --fade-e: min(var(--fade, 1.5rem), var(--scroll-area-overflow-x-end, var(--fade, 1.5rem)));
  mask-image: linear-gradient(
    to right,
    rgb(0 0 0 / 0),
    rgb(0 0 0 / 0.043) calc(var(--fade-s) * 0.125),
    rgb(0 0 0 / 0.156) calc(var(--fade-s) * 0.25),
    rgb(0 0 0 / 0.316) calc(var(--fade-s) * 0.375),
    rgb(0 0 0 / 0.5) calc(var(--fade-s) * 0.5),
    rgb(0 0 0 / 0.684) calc(var(--fade-s) * 0.625),
    rgb(0 0 0 / 0.844) calc(var(--fade-s) * 0.75),
    rgb(0 0 0 / 0.957) calc(var(--fade-s) * 0.875),
    #000 var(--fade-s),
    #000 calc(100% - var(--fade-e)),
    rgb(0 0 0 / 0.957) calc(100% - var(--fade-e) * 0.875),
    rgb(0 0 0 / 0.844) calc(100% - var(--fade-e) * 0.75),
    rgb(0 0 0 / 0.684) calc(100% - var(--fade-e) * 0.625),
    rgb(0 0 0 / 0.5) calc(100% - var(--fade-e) * 0.5),
    rgb(0 0 0 / 0.316) calc(100% - var(--fade-e) * 0.375),
    rgb(0 0 0 / 0.156) calc(100% - var(--fade-e) * 0.25),
    rgb(0 0 0 / 0.043) calc(100% - var(--fade-e) * 0.125),
    rgb(0 0 0 / 0)
  );
  mask-repeat: no-repeat;
}

@utility fade-l {
  --fade-s: min(var(--fade, 1.5rem), var(--scroll-area-overflow-x-start, var(--fade, 1.5rem)));
  mask-image: linear-gradient(
    to right,
    rgb(0 0 0 / 0),
    rgb(0 0 0 / 0.043) calc(var(--fade-s) * 0.125),
    rgb(0 0 0 / 0.156) calc(var(--fade-s) * 0.25),
    rgb(0 0 0 / 0.316) calc(var(--fade-s) * 0.375),
    rgb(0 0 0 / 0.5) calc(var(--fade-s) * 0.5),
    rgb(0 0 0 / 0.684) calc(var(--fade-s) * 0.625),
    rgb(0 0 0 / 0.844) calc(var(--fade-s) * 0.75),
    rgb(0 0 0 / 0.957) calc(var(--fade-s) * 0.875),
    #000 var(--fade-s)
  );
  mask-repeat: no-repeat;
}

@utility fade-r {
  --fade-e: min(var(--fade, 1.5rem), var(--scroll-area-overflow-x-end, var(--fade, 1.5rem)));
  mask-image: linear-gradient(
    to left,
    rgb(0 0 0 / 0),
    rgb(0 0 0 / 0.043) calc(var(--fade-e) * 0.125),
    rgb(0 0 0 / 0.156) calc(var(--fade-e) * 0.25),
    rgb(0 0 0 / 0.316) calc(var(--fade-e) * 0.375),
    rgb(0 0 0 / 0.5) calc(var(--fade-e) * 0.5),
    rgb(0 0 0 / 0.684) calc(var(--fade-e) * 0.625),
    rgb(0 0 0 / 0.844) calc(var(--fade-e) * 0.75),
    rgb(0 0 0 / 0.957) calc(var(--fade-e) * 0.875),
    #000 var(--fade-e)
  );
  mask-repeat: no-repeat;
}

@utility fade-* {
  --fade: calc(--value(number) * var(--spacing));
  --fade: --value([length]);
}

@utility pattern-dots {
  background-image: radial-gradient(currentColor 1px, transparent 1px);
  background-size: var(--pattern, 16px) var(--pattern, 16px);
}

@utility pattern-grid {
  background-image:
    linear-gradient(to right, currentColor 1px, transparent 1px),
    linear-gradient(to bottom, currentColor 1px, transparent 1px);
  background-size: var(--pattern, 16px) var(--pattern, 16px);
}

@utility pattern-* {
  --pattern: calc(--value(number) * var(--spacing));
  --pattern: --value([length]);
}

@keyframes shimmer {
  from { background-position: -150% 0; }
  to { background-position: 250% 0; }
}

@utility shimmer {
  --shimmer-c: var(--shimmer, rgb(255 255 255 / 0.5));
  background-image: linear-gradient(
    90deg,
    transparent,
    color-mix(in oklch, var(--shimmer-c) 4.3%, transparent) 6.25%,
    color-mix(in oklch, var(--shimmer-c) 15.6%, transparent) 12.5%,
    color-mix(in oklch, var(--shimmer-c) 31.6%, transparent) 18.75%,
    color-mix(in oklch, var(--shimmer-c) 50%, transparent) 25%,
    color-mix(in oklch, var(--shimmer-c) 68.4%, transparent) 31.25%,
    color-mix(in oklch, var(--shimmer-c) 84.4%, transparent) 37.5%,
    color-mix(in oklch, var(--shimmer-c) 95.7%, transparent) 43.75%,
    var(--shimmer-c) 50%,
    color-mix(in oklch, var(--shimmer-c) 95.7%, transparent) 56.25%,
    color-mix(in oklch, var(--shimmer-c) 84.4%, transparent) 62.5%,
    color-mix(in oklch, var(--shimmer-c) 68.4%, transparent) 68.75%,
    color-mix(in oklch, var(--shimmer-c) 50%, transparent) 75%,
    color-mix(in oklch, var(--shimmer-c) 31.6%, transparent) 81.25%,
    color-mix(in oklch, var(--shimmer-c) 15.6%, transparent) 87.5%,
    color-mix(in oklch, var(--shimmer-c) 4.3%, transparent) 93.75%,
    transparent
  );
  background-size: 200% 100%;
  background-repeat: no-repeat;
  @media (prefers-reduced-motion: no-preference) {
    animation: shimmer var(--shimmer-duration, 1.5s) linear infinite;
  }
}

@utility shimmer-* {
  --shimmer: --value(--color-*);
  --shimmer: color-mix(in oklch, --value(--color-*) calc(--modifier(number) * 1%), transparent);
}

/* sweep time in ms, like Tailwind's duration-* */
@utility shimmer-duration-* {
  --shimmer-duration: calc(--value(number) * 1ms);
  --shimmer-duration: --value([*]);
}

@property --shimmer-border-angle {
  syntax: '<angle>';
  inherits: false;
  initial-value: 0deg;
}

@keyframes shimmer-border-spin {
  to { --shimmer-border-angle: 360deg; }
}

@utility shimmer-border {
  position: relative;
  isolation: isolate;
  &::after {
    content: '';
    position: absolute;
    inset: 0;
    z-index: -1;
    border-radius: inherit;
    padding: var(--shimmer-border-width, 1.5px);
    background: conic-gradient(
      from var(--shimmer-border-angle),
      var(--shimmer-border-lo, transparent),
      var(--shimmer-border-hi, currentColor),
      var(--shimmer-border-lo, transparent) 25%
    );
    mask: linear-gradient(#000 0 0) content-box, linear-gradient(#000 0 0);
    mask-composite: exclude;
    pointer-events: none;
    @media (prefers-reduced-motion: no-preference) {
      animation: shimmer-border-spin var(--shimmer-border-duration, 3s) linear infinite;
    }
  }
}

@utility shimmer-border-* {
  --shimmer-border-width: calc(--value(number) * 1px);
  --shimmer-border-width: --value([length]);
  --shimmer-border-hi: --value(--color-*);
  --shimmer-border-hi: color-mix(in oklch, --value(--color-*) calc(--modifier(number) * 1%), transparent);
}

@utility shimmer-border-hi-* {
  --shimmer-border-hi: --value(--color-*);
  --shimmer-border-hi: color-mix(in oklch, --value(--color-*) calc(--modifier(number) * 1%), transparent);
}

@utility shimmer-border-lo-* {
  --shimmer-border-lo: --value(--color-*);
  --shimmer-border-lo: color-mix(in oklch, --value(--color-*) calc(--modifier(number) * 1%), transparent);
}

@utility shimmer-border-duration-* {
  --shimmer-border-duration: calc(--value(number) * 1ms);
  --shimmer-border-duration: --value([*]);
}

@utility squircle {
  corner-shape: superellipse(var(--squircle, 2));
}

@utility squircle-* {
  --squircle: --value(number, [number]);
  corner-shape: superellipse(var(--squircle));
}

@keyframes draw-path {
  to { stroke-dashoffset: 0; }
}

@utility draw-path {
  & path {
    @media (prefers-reduced-motion: no-preference) {
      stroke-dasharray: var(--draw-length, 1);
      stroke-dashoffset: var(--draw-length, 1);
      animation: draw-path var(--draw-duration, 1s) var(--draw-ease, ease) forwards;
    }
  }
}

/* draw time in ms, like Tailwind's duration-* */
@utility draw-path-duration-* {
  --draw-duration: calc(--value(number) * 1ms);
  --draw-duration: --value([*]);
}

/* easing from the --ease-* scale, like Tailwind's ease-* */
@utility draw-path-ease-* {
  --draw-ease: --value(--ease-*);
  --draw-ease: --value([*]);
}

@utility film-grain {
  position: relative;
  isolation: isolate;
  &::after {
    content: '';
    position: absolute;
    inset: 0;
    z-index: 1;
    border-radius: inherit;
    pointer-events: none;
    opacity: var(--grain-opacity, 0.035);
    mix-blend-mode: var(--grain-blend, overlay);
    animation: var(--grain-animation, none);
    background-image: url("data:image/svg+xml,%3Csvg xmlns='http://www.w3.org/2000/svg' width='256' height='256'%3E%3Cfilter id='g' color-interpolation-filters='sRGB'%3E%3CfeTurbulence type='fractalNoise' baseFrequency='0.8' numOctaves='2' stitchTiles='stitch'/%3E%3CfeColorMatrix type='matrix' values='0.33 0.33 0.33 0 0 0.33 0.33 0.33 0 0 0.33 0.33 0.33 0 0 0 0 0 0 1'/%3E%3C/filter%3E%3Crect width='100%25' height='100%25' filter='url(%23g)'/%3E%3C/svg%3E");
    background-size: var(--grain-size, var(--grain-size-md)) var(--grain-size, var(--grain-size-md));
  }
}

@utility grain {
  @apply film-grain;
}

@utility grain-* {
  --grain-size: --value(--grain-size-*, [length]);
  --grain-blend: --value(--grain-blend-*);
  @apply film-grain;
}

@utility grain-opacity-* {
  --grain-opacity: calc(--value(number) * 1%);
  --grain-opacity: --value([percentage]);
}

@utility grain-animate {
  @media (prefers-reduced-motion: no-preference) {
    --grain-animation: grain-flicker 0.5s steps(1) infinite;
  }
}

@utility blur-ramp {
  --progressive-blur-layers: 6;
  position: relative;
  isolation: isolate;
  /* Optional scrim: a color wash over the strong-blur end that hides the
     shimmer backdrop-filter gives off as content scrolls. Off until a
     progressive-blur-scrim-* class sets the color. */
  &::after {
    content: '';
    position: absolute;
    inset: 0;
    z-index: calc(var(--progressive-blur-layers) + 1);
    pointer-events: none;
    border-radius: inherit;
    background: linear-gradient(
      to top,
      transparent,
      var(--progressive-blur-scrim, transparent)
    );
  }
  & > * {
    position: absolute;
    inset: 0;
    z-index: var(--blur-layer);
    border-radius: inherit;
    pointer-events: none;
    backdrop-filter: blur(
      calc(var(--progressive-blur-amount, var(--blur-lg)) * pow(2, (var(--blur-layer) - var(--progressive-blur-layers))))
    );
    mask-image: linear-gradient(
      to top,
      transparent calc(100% / var(--progressive-blur-layers) * (var(--blur-layer) - 2)),
      black calc(100% / var(--progressive-blur-layers) * (var(--blur-layer) - 1)),
      black calc(100% / var(--progressive-blur-layers) * var(--blur-layer)),
      transparent calc(100% / var(--progressive-blur-layers) * (var(--blur-layer) + 1))
    );
  }
}

@utility progressive-blur {
  @apply blur-ramp;
}

@utility progressive-blur-* {
  --progressive-blur-amount: --value(--blur-*);
  @apply blur-ramp;
}

@utility progressive-blur-scrim-* {
  --progressive-blur-scrim: --value(--color-*);
}